The Wisconsin Master Plumber’s guide to water heater maintenance.
The benefits of preventative maintenance and maintaining your tank style gas water heater or tank style electric water heater are vast and range from increasing the life expectancy of the water heater to lowering its cost of operations. In this guide, you will be walked through a comprehensive annual maintenance protocol that will ensure your hot water heater is operating safely, efficiently and will last.
Tools you will need for water heater maintenance
- Garden hose
- Basic hand tools such as ¼” nut driver, 5-in-1 screwdriver and crescent wrenches
- Set of 12-14″ pipe wrenches
- Impact driver with a 1-1/16″ socket wrench
- Teflon tape & pipe thread sealant
- Dish soap and water
How often should you service your water heater?
Every 6-12 months.
Pro Tip- Never go more than 12 months between maintaining and flushing out your water heater.
When it comes to flushing, you can’t “over maintenance” your water heater, which is great news. However, going too long between water heater flushing can make getting all of the sediment off the bottom of the heater difficult.
How long does it take to complete this water heater maintenance process
Proper annual maintenance maintenance for your water heater takes time. To do the job correctly you should budget around 2 hours from start to finish. This takes into account the amount of time it will take your hot water heater to heat back up when you are finished. When performing water heater maintenance as a homeowner, many schedule this for a day of work during the week in case something goes wrong in the process you can call Austin Plumbing, Heating & Air to help you finish the job!
Step by step tank style water heater maintenance
Step 1- For gas water heater maintenance
Turn the gas valve to the “pilot or vacation setting”- This will keep the pilot lit but prevent the water heater from turning on during maintenance. Alternatively, you can shut off the gas supply to the water heater. This too will insure the water heater is in a safe condition for service but will require you light the pilot when you are finished. If you have a power vented water heater, be sure to unplug it from the wall as well.
Pro Tip- If you need to move the temperature setting dial, take a photo of the original setting or mark the temperature setting with a marker so you know where it was set.
Step 1- For electric water heater maintenance
Turn off the power- Shut off the circuit breaker to the water heater or at the switch on the wall near the water heater. Draining the water out of an electric water heater without turning off the power will cause serious damage to the unit.
Step 2- Pressure flush the water heater tank (this is the same process for gas & electric heaters)
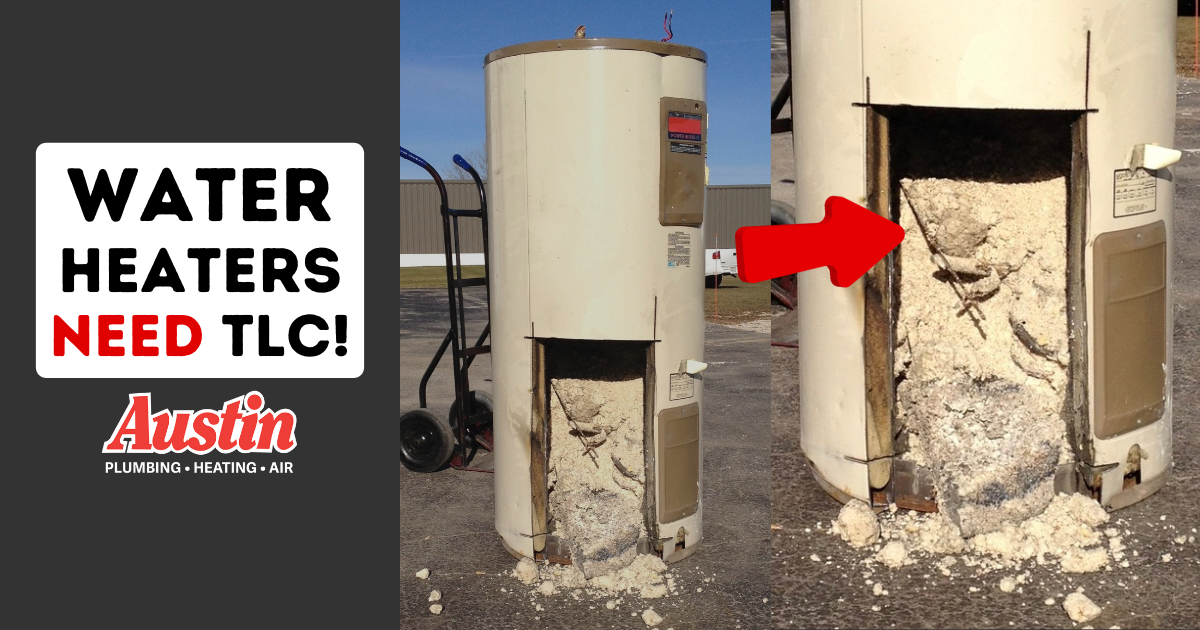
We have found that the most effective way to dislodge hard to remove sediments that are common in Wisconsin water from the bottom of the water heater is through the pressure flush method of water heater flushing. The benefits are that sediment is dislodged from the bottom and suspended into the water making this a more complete water heater flush.
- Attach a garden hose to the water heater drain down valve and run the garden hose to the closest floor drain. Pro Tip- Place something heavy on the garden hose near the floor drain because this will prevent the hose from jumping out of the floor drain and making a mess in the basement.
- With the incoming water valve still on, slowly open the drain down valve on the bottom of the water heater.
- Flush the bottom of the water heater under full water pressure for 2 minutes.
- Close the incoming water valve.
- Let the water heater rest for 1 minute- You can also leave the drain valve open so only a minor amount of water will continue to drain without releasing the airlock (more on that in the next section).
- Slowly open the incoming water valve to the water heater again and allow the water heater to flush for 2 more minutes.
- Close the main shut off valve on the hot water heater.
Step 3- Let the water heater drain completely empty
In order to get the water heater to drain completely by gravity, we will need to release the air lock in the hot water system.
- Locate an unrestricted faucet such as a laundry faucet in your basement or on the first floor of your home.
- Open the hot side only of that faucet. When you open the faucet, you should hear a gurgle as the airlock is released and the heater starts to draw in air and drain.
- You will also notice that water will start to flow freely out of the garden hose vs. glugging out or just running slowly.
Pro Tip- Completely draining a water heater can take up to 30 minutes, sometimes longer depending on the size. While the heater is draining, continue on to your other maintenance items.
Step 4- Other things to check while maintaining your water heater
Gas Only- Water heater venting.You’re looking for any signs of rusting or corrosion. If you see corrosion this is a cause for concern.
Gas Only- Clean the air intake filters. Many modern water heaters draw in air from the bottom and side for combustion. Referencing the owner’s manual, locate any air filters, remove them, clean them and replace them.
Gas Only- Check the gas piping for leaks. Using a mixture of dish soap and water, you can make a simple gas leak detector and apply some to each gas pipe joint to check for gas leaks.
Electric Only- Inspect electrical connections for signs of shorting or sparking.
Pro Tip- Be careful not to drip water on the gas control valve.
Relief valve- To operate or not to operate that is the question. According to many manufacturers, the relief valve should be operated by hand. Although this is a recommended step, many homeowners skip this step because of the increased chance of temperature & pressure relief valve leakage after doing so.
Clearance around water heater- Take a look around the water heater area and relocate items that are stored within a few feet of the water heater.
Inspect the water pipe- The water pipes on and around the water heater should be visually inspected for leaks and corrosion.
Step 5- Remove and inspect the anode rod
The anode rod is a sacrificial item installed in all water heaters that is designed to to extend the life of the tank. Removing the anode rod for inspection is a critical step in proper water heater maintenance but does require special tools and equipment.
- Locate the anode rod- Most anode rods are accessible from the top of the water heater through a labeled port. Some anode rods are attached to the cold water inlet, which is the case for Bradford White water heaters.
- Hex head anode rods- If the anode rod is a hex head anode rod, you will need a deep 1-1/16″ socket and an impact driver. It can be removed with a 1-1/16″ socket wrench and impact driver or breaker bar.
- Cold inlet anode rods- If you are maintaining a Bradford White water heater or other heater where the anode rod is attached to the cold water inlet, then you will need pipe wrenches to disconnect the union and remove the anode rod.
- Pull the anode rod- Remove the anode rod from the water heater and inspect. Replace if the anode rod is deteriorated and near the end of its life.
- Reinstall the anode rod- Use pipe teflon tape and pipe dope when reinstalling the anode rod and be careful not to cross thread the anode rod during re-installation. We also recommend using a breaker bar to reinstall the hex head anode, not the impact driver.
Step 6- Rinse the water heater
By now the water heater should be fully drained. You can tell when the tank is empty when the garden hose is no longer flowing water. The final step to the water heater flush is to rinse the heater.
- Slowly open the incoming water valve to the water heater and let water run into the heater for approximately 1 minute.
- Close the incoming water heater valve and let the tank drain again.
- Repeat this process 2 times for the most complete water heater flush possible.
Step 7- Refill the water heater
- Close the drain valve on the bottom of the water heater.
- Slowly open the incoming cold water valve and begin to fill the tank.
- Note- Remember that we still have a faucet open in the house. While the water heater is filling you may notice some gurgling and sputtering from that faucet.
- When the faucet stops sputtering and is flowing a steady flow of water, you know the water heater is full.
- Inspect the anode rod, main shut off and other piping for leaks.
- Go from faucet to faucet in the home and purge the air from the hot water system. It is common to get spitting and sputtering and some discolored water during this process.
Step 8- Relight the pilot and power up the water heater
Before you proceed to turning the power back on to the water heater or relighting the pilot, it’s critical that the water heater be full of water.
- Turn the water heater gas control valve back to the ON position.
- If you shut the gas off completely, turn the gas back on to the water heater if you are working on a gas unit and follow the instructions printed on the water heater tank for relighting the pilot.
- Typically power vented gas water heaters don’t have a pilot light and only require to be plugged back in and switched on.
- For electric water heaters, turn the circuit breaker back on.
Step 9- Clean up and double check you work
While you clean up your work area, keep an eye on all of the water heater components that you have been working around and adjusting during the water heater maintenance.
- Keep an eye out for drips and leaks from the cold water valve and relief valve.
- Monitor for any smells of gas. A slight gas odor is normal just after firing the water heater up.
Step 10- Document the date of service on the water heater
Keeping track of when you last performed water heater maintenance helps you keep on top of making sure it gets done annually!
- Record the date of water heater heater service on the tank with a sharpie marker.
- Set a reminder in your phone calendar to remind you to complete water heater maintenance next year!
Congratulations! If you completed all of the steps above, you have done everything a homeowner can do to insure a long life from your water heater. If you run into any problems or would prefer to have a water heater pro from Austin Plumbing, Heating & Air perform your water heater maintenance, call our office at 262-367-3808 to book service. We also have an annual whole home plumbing maintenance program where not only do we perform the water heater maintenance, but we also inspect the entire plumbing system.